
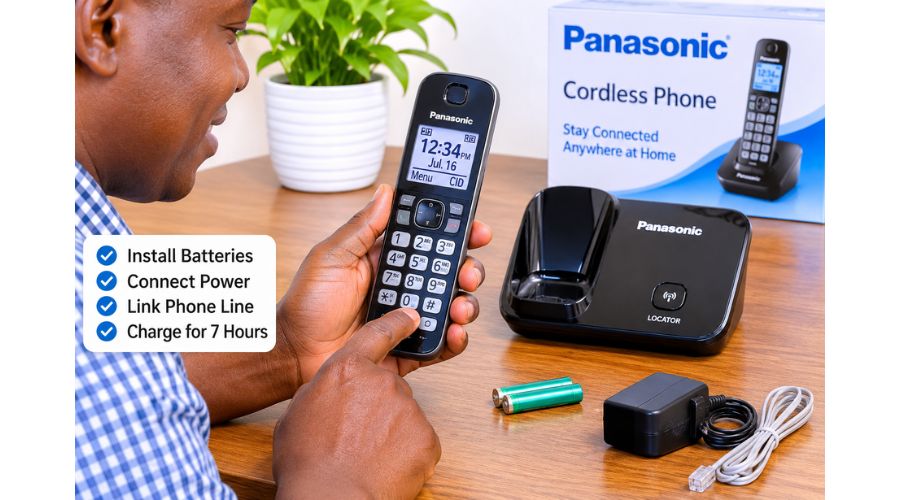
Panasonic cordless phones are popular for their convenience, dependable performance, and practical features for home and office communication. Unlike traditional corded phones, cordless models allow you to move around while talking, making them useful in homes, workshops, reception areas, and small businesses.
Many Panasonic cordless phone systems also support multiple handsets connected to a single base unit. Depending on the model, you may be able to transfer calls between handsets, use an intercom function, share a phonebook, and adjust settings across the system.
However, these features are only useful when the phone is properly installed and configured. A handset that is not charged, registered to the base, or connected to a working telephone service may fail to make or receive calls.
If you have recently purchased a Panasonic cordless phone, you may be wondering how to set it up, connect it to your telephone line, and program its different features.
This guide explains how to set up Panasonic cordless phones, register additional handsets, configure basic settings, and troubleshoot common problems. Because Panasonic produces several cordless phone models, the exact menu names and button combinations may differ. Always consult your model’s manual when a particular instruction does not match your handset.
Also Read:
How to Set Up Panasonic Cordless Phones
Setting up a Panasonic cordless phone involves installing the batteries, connecting the base unit to power and a compatible telephone service, charging the handset, and completing any required registration.
The basic setup process is straightforward, but it is important to follow the correct order. A handset that has not been charged or registered may not work properly, even when the base unit is connected to a telephone line.
Before beginning, unpack the phone and check that you have the following components:
-
Panasonic cordless handset or handsets
-
Base unit
-
Rechargeable handset batteries
-
AC power adapter
-
Telephone line cord, if supplied
-
Charging cradle, if included
-
User manual
Some Panasonic cordless phone systems include a separate charging cradle for each additional handset. Others use a single base unit that also serves as the primary charging station.
Step 1: Install the Cordless Phone Batteries
Start by installing the rechargeable batteries supplied with your Panasonic cordless phone.
Most Panasonic cordless handsets have a battery compartment on the back. Depending on the model, you may need to slide or lift the battery cover to access it.
Open the compartment and insert the batteries according to the polarity markings inside. The positive and negative terminals must match the symbols indicated in the battery compartment.
Do not assume that the batteries should always be inserted negative-terminal-first. Follow the markings on your particular handset.
Once the batteries are correctly installed, replace the cover securely.
If your phone uses a rechargeable battery pack rather than individual rechargeable batteries, connect it according to the instructions supplied with the handset.
Important: Use only the battery type specified for your Panasonic model. Ordinary disposable batteries should not be used in a handset designed for rechargeable batteries unless the manufacturer explicitly permits them.
Step 2: Connect the Base Unit to a Power Source
The base unit needs electrical power to operate and communicate with the cordless handset.
Locate the AC adapter supplied with your Panasonic phone. Connect the adapter to the power input on the base unit, then plug it into a suitable electrical outlet.
Use the adapter supplied with the phone or a replacement approved by Panasonic for that model.
After connecting the power, check the base unit for an indicator light or other sign that it is receiving electricity.
If the base unit does not appear to power on, check that the adapter is firmly connected at both ends and that the electrical outlet is working.
Avoid using an incompatible adapter, as an incorrect voltage or connector may damage the phone.
Step 3: Charge the Handset
Place the handset in the charging cradle or on the base unit, depending on your phone’s design.
Make sure the handset is positioned correctly so that the charging contacts can connect.
A charging symbol or indicator light may appear on the handset or base unit. The exact indicator varies by model.
Allow the batteries to charge for the period recommended in the user manual. Some Panasonic models require approximately seven hours for an initial charge, while others have different charging requirements.
Do not assume that every Panasonic cordless phone needs the same charging time.
If the handset does not show that it is charging, check the battery installation, charging contacts, and power connection.
Step 4: Connect the Telephone Line
To make and receive calls through a traditional telephone service, the base unit must be connected to a compatible telephone line.
Locate the telephone line port on the base unit. It is commonly labeled LINE.
Connect one end of the telephone line cord to this port and the other end to the appropriate telephone wall jack or telephone service adapter.
The correct connection depends on the service you use.
If your telephone service is supplied through a modem or router, connect the phone to the designated telephone port rather than an ordinary Ethernet port.
A standard Panasonic cordless phone does not connect directly to an Ethernet cable. If your provider supplies telephone service through a router, use the telephone connection provided by that equipment.
Some Panasonic cordless phone systems are designed for particular digital telephone services or require a compatible adapter. Check the phone’s specifications and your provider’s instructions before connecting it.
Step 5: Check That the Phone Is Ready
Once the handset has charged and the base unit is connected, check the handset display.
Depending on the model, you may see the handset number, battery indicator, date, time, or a message indicating that the phone is ready.
If the display shows that the handset is not registered, you may need to complete the registration process before using it.
If the handset is registered but cannot make calls, check the telephone line connection and confirm that your telephone service is active.
Try making a test call to a number you can safely reach. If the call connects and you can hear both parties, the basic setup is complete.
How to Program Panasonic Cordless Phones
After completing the physical setup, you can program your Panasonic cordless phone to suit your preferences.
Programming allows you to adjust the date and time, configure the ringer, save contacts, set up voicemail access, and activate features such as night mode.
The exact menu structure varies between Panasonic models. Some handsets use a dedicated MENU button, while others use a soft key or a navigation button to access settings.
Understanding the Panasonic Cordless Phone Menu
Before programming your phone, familiarize yourself with the main buttons.
| Button | Common function |
|---|---|
| MENU | Opens the phone’s settings and features |
| OK or SELECT | Confirms a selection |
| Navigation arrows | Moves through menus and options |
| TALK or OFF | Starts or ends a call |
| PHONEBOOK | Opens saved contacts |
| REDIAL | Displays recently dialed numbers |
| INTERCOM | Calls another registered handset |
| MUTE | Temporarily disables your microphone |
Some Panasonic handsets combine several functions into one button. The function available may depend on whether the phone is idle or you are already on a call.
How to Navigate the Menu
To access the settings menu, press MENU while the handset is idle.
Use the navigation arrows to move through the available options. When you find the setting you want, press OK or SELECT.
If the selected option opens a submenu, use the navigation buttons to find the required setting.
After making a change, press OK or SELECT to confirm it if prompted.
To leave the menu, press OFF or use the handset’s back option.
Some models also support direct feature codes. These are combinations of menu buttons and numbers that open particular settings without requiring you to navigate through every menu.
Because the codes are not identical across all Panasonic phones, use the feature codes listed in your model’s manual rather than assuming a code from another handset will work.
How to Set the Date and Time on a Panasonic Cordless Phone
Setting the correct date and time is important because some Panasonic phones use this information to display call logs, record missed calls, and operate scheduled features.
If the date and time are incorrect, the call history may be difficult to interpret.
To set the date and time:
-
Press MENU while the handset is idle.
-
Use the navigation arrows to locate the date and time settings.
-
Press OK or SELECT.
-
Enter the current date using the format shown on the display.
-
Enter the current time.
-
Select AM or PM if your model uses a 12-hour clock.
-
Confirm the settings and exit the menu.
Some models support automatic time updates through the telephone network, while others require manual entry.
If your phone has an automatic time setting, check whether it is enabled before changing the time manually.
How to Set Night Mode on a Panasonic Cordless Phone
Night mode allows you to reduce interruptions during selected hours.
Depending on the model, this feature may silence the handset ringer, the base unit ringer, or both. It may also allow you to choose specific handsets that should remain audible.
Night mode is particularly useful when you do not want incoming calls to disturb you while sleeping or working.
Steps to Activate Night Mode
-
Press MENU on the handset.
-
Locate the night mode or silent mode setting.
-
Select the option to activate or configure it.
-
Enter the starting time.
-
Enter the ending time.
-
Choose the handsets or ringer settings you want to apply, if supported.
-
Save the changes.
Some Panasonic models allow you to set different night mode schedules for different days.
If your phone does not have a night mode feature, you may still be able to silence the ringer manually or use a do-not-disturb setting.
Remember that silencing the handset does not necessarily prevent calls from reaching the telephone system. It only changes how the phone alerts you.
How to Set an Alarm on a Panasonic Cordless Phone
Some Panasonic cordless phones include an alarm or reminder function.
This feature allows you to set a specific time for the handset to produce an alert.
The alarm can be useful for reminders, appointments, or other activities where you need a notification.
To set an alarm:
-
Open the handset’s menu.
-
Locate the alarm or reminder setting.
-
Select the required alarm type, if available.
-
Enter the time you want the alarm to sound.
-
Choose whether the alarm should repeat, if your model supports this option.
-
Select the available alarm tone.
-
Save the settings.
Not every Panasonic cordless phone includes an alarm function. If you cannot find this option, check your model’s user manual.
How to Set Up Voicemail on a Panasonic Cordless Phone
Panasonic cordless phones may include a dedicated voicemail access button, but voicemail itself is usually provided by your telephone service provider.
This distinction is important because the phone does not necessarily store or manage the voicemail messages.
The handset may simply provide a convenient way to call the voicemail service.
Configure the Voicemail Access Number
If your Panasonic handset allows you to program a voicemail access number:
-
Press MENU.
-
Locate the voicemail or answering system settings.
-
Select the voicemail access number option.
-
Enter the voicemail number supplied by your telephone service provider.
-
Save the number.
Some service providers require a PIN or passcode to access voicemail. Follow the provider’s instructions when configuring these details.
If the handset supports pauses or additional dialing commands, consult the manual for the correct procedure.
Panasonic Answering Machine Versus Provider Voicemail
Some Panasonic cordless phone systems include a built-in answering machine.
This is different from voicemail supplied by your telephone company.
A built-in answering machine records messages on the phone’s base unit. Provider voicemail stores messages through the telephone network.
Depending on the model and service, you may be able to use one or both features.
Check the answering system settings to determine which service is active.
How to Register a Panasonic Cordless Handset to a Base Unit
Registering a handset connects it to the base unit so that the two devices can communicate.
This process is necessary when adding an additional handset, replacing a handset, or reconnecting a handset that has lost its registration.
Panasonic often refers to this process as handset registration.
The exact procedure varies by model, but the general steps are similar.
Step 1: Prepare the Handset
Make sure the handset has sufficient battery charge.
Turn it on and locate the registration option in the menu.
Depending on the model, this option may be found under:
-
Initial setup
-
Handset setup
-
Registration
-
Register handset
Select the registration option and follow the instructions displayed on the handset.
Step 2: Activate Registration on the Base Unit
Locate the handset locator or registration button on the base unit.
The button may be labeled LOCATOR, HANDSET LOCATOR, or another similar name.
On some models, the button is located on the side or underside of the base unit.
Press and hold the registration button for the period specified in the manual.
Some Panasonic models use a short press, while others require you to hold the button for several seconds.
Do not assume that the registration button is always identified by a Wi-Fi symbol. Panasonic cordless phones use different button designs.
Step 3: Complete the Registration Process
After activating registration on the base unit, follow the instructions on the handset display.
The handset may automatically detect the base unit and complete registration.
Some models may ask you to enter a base unit PIN.
If a PIN is required, use the number specified in the user manual. The default is not necessarily the same for every Panasonic model.
Once registration is complete, the handset should display its assigned number or another indication that it is connected.
Try making an intercom call or a test telephone call to confirm that the handset is working.
How to Add an Additional Panasonic Cordless Handset
Many Panasonic cordless phone systems support multiple handsets.
Adding an extra handset allows different people in the household or office to use the same telephone service.
Before purchasing an additional handset, check that it is compatible with your base unit.
A handset that looks similar to your existing model may not support the same registration system.
Registering the Additional Handset
The process is generally as follows:
-
Charge the additional handset.
-
Open the handset menu.
-
Locate the registration option.
-
Activate registration on the base unit.
-
Follow the instructions displayed on the handset.
-
Confirm that the handset has registered successfully.
Some Panasonic systems allow you to assign handset numbers during registration.
If your system already has the maximum number of handsets registered, you may need to remove an unused handset before adding another one.
Check your model’s specifications to determine how many handsets it supports.
Operating Instructions for a Panasonic Cordless Phone
Once your Panasonic cordless phone is installed and programmed, you can begin using its basic calling features.
Although button names vary, most Panasonic handsets provide controls for answering calls, adjusting volume, placing calls on hold, and communicating between handsets.
How to Make a Call
To make a call using a Panasonic cordless phone:
-
Press TALK or the button displaying a telephone symbol.
-
Wait for the dial tone, if your telephone service provides one.
-
Enter the telephone number.
-
Wait for the call to connect.
Some models allow you to enter the telephone number first and then press TALK.
This method is useful when you want to check the number before placing the call.
If you enter an incorrect digit, use the handset’s delete or clear button to correct it before dialing.
How to Answer an Incoming Call
When the phone rings, press TALK or the button indicated on the handset display.
Some Panasonic models allow you to answer a call simply by lifting the handset from the base or charging cradle.
This feature may need to be activated in the settings.
To end the call, press OFF or place the handset back on the base if your model supports call termination by docking.
How to Adjust the Call Volume
During a call, use the volume buttons or navigation arrows to adjust the listening level.
The available volume range varies by model.
If you cannot hear the caller clearly, increase the handset volume gradually.
If the caller cannot hear you, check whether the microphone is muted.
How to Put a Call on Hold
Some Panasonic handsets include a dedicated HOLD button.
Pressing this button places the call on hold, allowing you to temporarily pause the conversation.
To resume the call, press HOLD again or use the handset’s displayed call control.
If you want another handset to answer the call, check whether your model supports call transfer or call sharing.
How to Mute a Call
The mute function temporarily disables the microphone.
This allows you to speak privately or reduce background noise without ending the call.
To mute a call, press the MUTE button or select the mute option on the handset display.
To resume speaking, press the mute control again.
The caller may still be able to hear other sounds if the microphone is not fully muted, so check the display indicator before speaking privately.
How to Make an Intercom Call on a Panasonic Cordless Phone
An intercom call allows you to communicate with another registered handset without placing an external telephone call.
This feature is useful in homes with multiple handsets or in offices where people need to communicate between rooms.
The exact procedure varies by model, but the general process is:
-
Press the INTERCOM button or open the handset menu.
-
Select the intercom option.
-
Choose the handset you want to contact.
-
Press TALK, OK, or SELECT as prompted.
-
Wait for the other handset to answer.
When the conversation is finished, press OFF to end the intercom call.
Some Panasonic systems support group paging, allowing you to contact several registered handsets at once.
If your handset does not display an intercom option, check whether the feature is supported by your particular model.
How to Transfer a Call Between Panasonic Handsets
Call transfer allows you to move an external call from one handset to another.
This is useful when one person answers a call but another person needs to speak with the caller.
On supported models, the general procedure is:
-
Press the INTERCOM or TRANSFER button during the external call.
-
Select the handset you want to receive the call.
-
Wait for the other handset to answer.
-
Announce the call if necessary.
-
Follow the displayed instructions to complete the transfer.
Some models allow you to transfer a call without speaking to the receiving handset first.
The available transfer options depend on the base unit and handset model.
How to Save Contacts on a Panasonic Cordless Phone
The phonebook allows you to save frequently used telephone numbers so you do not have to enter them every time you make a call.
Many Panasonic cordless systems allow the phonebook to be shared between registered handsets, although this depends on the model.
To add a contact:
-
Open the phonebook.
-
Select the option to add a new entry.
-
Enter the person’s name.
-
Enter the telephone number.
-
Save the entry.
Some models support additional information, such as multiple numbers or contact categories.
To call a saved contact, open the phonebook, select the name, and press TALK.
If your system supports phonebook sharing, you may be able to transfer contacts between handsets or access the same list from multiple devices.
How to Use the Redial Feature
The redial function allows you to call a number that you recently dialed.
To use it, press REDIAL while the handset is idle.
Use the navigation buttons to select the desired number from the list.
Press TALK to place the call.
The number of entries stored in the redial list varies by model.
Some Panasonic phones also allow you to delete individual entries or clear the entire redial list.
How to Reset a Panasonic Cordless Phone
Resetting a Panasonic cordless phone may help resolve certain configuration problems.
However, a reset can erase settings, registered handsets, or stored information, depending on the type of reset performed.
Before resetting your phone, try simpler troubleshooting steps such as checking the power supply, charging the handset, and reconnecting the telephone line.
If a reset is necessary, consult your model’s manual for the correct procedure.
Some Panasonic models provide separate options for resetting the handset, the base unit, or individual settings.
Avoid performing a factory reset unless you understand which settings and stored information will be erased.
Troubleshooting Panasonic Cordless Phone Setup Problems
Even when you follow the correct installation procedure, your Panasonic cordless phone may not work as expected.
The following troubleshooting steps can help identify common problems.
Panasonic Cordless Phone Not Connecting to the Base
If the handset cannot connect to the base unit, check whether it is registered.
If the display shows that the handset is not registered, repeat the registration procedure.
Make sure the base unit is receiving power and that the handset has sufficient battery charge.
If the handset remains disconnected, check the manual for the correct registration procedure and PIN.
Panasonic Cordless Phone Not Charging
If the handset does not charge, check the battery installation and make sure the charging contacts are clean.
Confirm that the base unit or charging cradle is connected to a working electrical outlet.
If possible, test the handset with a compatible charging cradle or battery.
A faulty battery, charger, or charging contact may prevent the handset from charging properly.
Panasonic Cordless Phone Has No Dial Tone
If the handset is powered on but there is no dial tone, check the telephone line connection.
Make sure the line cord is connected to the correct port on the base unit and that your telephone service is active.
If your service is supplied through a modem or router, check the telephone connection provided by that equipment.
You can also test the telephone service using another compatible phone.
Panasonic Cordless Phone Cannot Make or Receive Calls
If the phone cannot make or receive calls, verify that the handset is registered and that the base unit is connected to a working telephone service.
Check whether call blocking, do-not-disturb settings, or night mode is preventing the phone from ringing.
If the problem continues, contact your telephone service provider to confirm that the line is active and operating correctly.
Conclusion
Panasonic cordless phones offer convenient communication features for homes and offices, including multiple handsets, intercom calls, phonebook storage, and flexible calling controls.
Setting up a Panasonic cordless phone involves installing the correct batteries, connecting the base unit to power and a compatible telephone service, charging the handset, and registering it when necessary.
Once the basic setup is complete, you can program the phone’s date and time, configure night mode, set up voicemail access, and adjust other available features.
Because Panasonic produces several cordless phone models, some instructions and menu options may differ. Always check your model’s user manual when a button or setting does not match the instructions in this guide.
With the correct setup and a little familiarity with the handset controls, you can use your Panasonic cordless phone confidently for everyday communication