
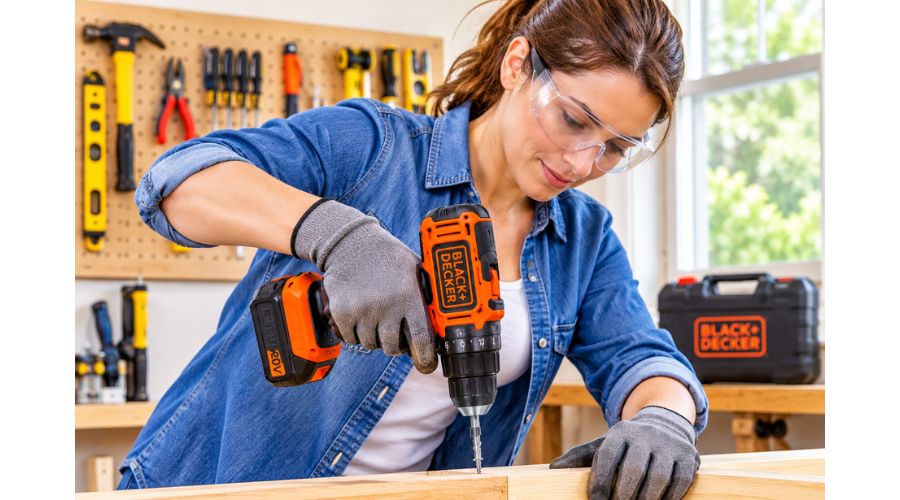
A Black+Decker cordless drill is a practical tool for home repairs, woodworking, furniture assembly, and a wide range of do-it-yourself projects. Its rechargeable battery lets you work without a power cord, while features such as a variable-speed trigger, adjustable clutch, and keyless chuck make many tasks easier.
Even so, getting good results requires more than pulling the trigger. You need to select the correct bit, set the drill’s direction and speed, and use the right amount of torque for the material and fastener. Incorrect settings or poor handling can damage a screw, split wood, break a drill bit, or cause the tool to twist unexpectedly.
This guide explains how to use a Black+Decker cordless drill for drilling holes and driving screws. It also covers the main parts of the tool, how to change bits, basic maintenance, safety precautions, and common problems. Since features vary by model, refer to your drill’s manual whenever a control or setting is unfamiliar.
Also Read:
Can a cordless Drill Go Through Concrete?
What Is a Black+Decker Cordless Drill?
A Black+Decker cordless drill is a battery-powered tool used to drill holes and, with a suitable screwdriver bit, install or remove screws. Because it does not need to be plugged into an outlet while operating, it is convenient for jobs around the house, in a workshop, or in areas where access to electricity is limited.
Many models include a variable-speed trigger, forward and reverse control, a keyless chuck, and a clutch for adjusting screw-driving force. Some models also have a two-speed gearbox, an LED work light, or a hammer-drilling function. Not every drill has all these features, so check the labels and instructions for your specific model.
A cordless drill can help with tasks such as:
- Assembling furniture and cabinets
- Installing shelves, curtain brackets, and hardware
- Drilling pilot holes in wood
- Driving screws into suitable materials
- Removing screws during repairs
- Drilling holes in wood, plastic, or metal with the correct bit
For safe and effective results, match the drill bit and settings to the task. A light-duty drill may not be suitable for continuous heavy-duty work or drilling large holes in dense materials.
Main Parts of a Black+Decker Cordless Drill
Knowing the main parts of the drill helps you understand how to operate it and troubleshoot common issues.
Variable-speed trigger
The trigger starts the motor. On models with variable-speed control, squeezing it lightly produces a slower rotation, while squeezing it farther increases the speed. Releasing the trigger stops the drill.
Start slowly when a bit first touches the material. This helps you keep the bit in position and gives you more control.
Forward/reverse selector
The forward/reverse selector changes the direction in which the chuck rotates. Forward is generally used for drilling and driving screws. Reverse is used to remove screws and may help release a bit from a workpiece.
The selector is usually near the trigger. Check the arrows or markings on your drill to identify the correct position. On many models, the center position locks the trigger.
Torque adjustment collar
The numbered collar behind the chuck adjusts the clutch’s torque setting on models that have one. The clutch helps limit the turning force applied when driving screws.
A lower setting is often suitable for small screws or delicate materials. A higher setting may be needed for larger screws or denser materials. The numbers are relative settings, not universal torque measurements.
Chuck
The chuck holds the drill bit or screwdriver bit. Many Black+Decker cordless drills have a keyless chuck that can be tightened or loosened by hand.
The bit must be held securely. A loose bit can wobble, slip, or fall out during use.
Battery and charger
The battery supplies power to the drill, while the charger replenishes it. Use only a battery and charger specified for your model. Black+Decker batteries are not necessarily interchangeable across every tool or battery platform.
Gear selector
Some models have a separate gear selector, often marked with numbers such as 1 and 2. A low gear generally provides lower speed and greater turning force. A higher gear provides greater speed for drilling.
The gear selector is different from the numbered torque collar. Not every model has a two-speed gearbox.
LED work light
Some drills include a built-in LED light that illuminates the area near the bit when the trigger is pressed. It can be helpful in dim spaces, but it does not replace adequate lighting.
Before You Use the Drill
A few simple checks can make the job safer and help prevent damage to the tool.
Check the battery charge
Make sure the battery has enough charge for the task. If it is low, remove it from the drill and charge it using the recommended charger. A battery that is nearly depleted may cause the drill to slow down or stop during work.
For longer projects, a compatible spare battery can reduce interruptions. Store and handle batteries according to the manufacturer’s instructions.
Inspect the drill and accessories
Before starting, check that the battery is seated securely and that the drill, battery, and charger show no obvious damage. Inspect the chuck and bit for wear, cracks, or looseness. Use a sharp bit that is designed for the material you are working on.
Do not use a damaged battery, charger, or drill. If the tool has been dropped or exposed to water, inspect it and follow the manufacturer’s guidance before using it again.
Secure the workpiece
Clamp the material to a stable surface whenever practical. Avoid holding a small piece of wood or metal in one hand while drilling with the other. The bit can catch, causing the material to spin or the drill to twist.
Clear clutter from the work area and make sure you have enough space to control the tool.
How to Use a Black+Decker Cordless Drill
The following steps apply to many Black+Decker cordless drills. Controls and features vary, so use the manual for your exact model if the layout differs.
Step 1: Insert the battery
With the trigger released, slide the charged battery into the drill until it locks into place. You should feel or hear it click. Gently check that it is secure before operating the tool.
If the battery does not fit easily, do not force it. Confirm that it is compatible with your drill and that the rails and contacts are clean and undamaged.
Step 2: Select the direction of rotation
Release the trigger and locate the forward/reverse selector. Choose forward for normal drilling and screw installation. Choose reverse to remove a screw.
If your model has a center lock position, use it when changing bits, adjusting the tool, or carrying it. Always release the trigger before changing direction. Switching direction while the motor is running can damage the tool or make it difficult to control.
Step 3: Choose the operating mode
If your drill has a mode collar, select the mode that matches the task. Common options include:
- Drilling mode: Used for making holes. It is often represented by a drill-bit symbol.
- Screw-driving mode: Uses the clutch to help limit torque when driving screws.
- Hammer mode: Available on some models for suitable masonry drilling.
Do not assume that every Black+Decker drill has a hammer function. Check your model’s markings and instructions before using it on masonry.
Step 4: Select the gear and speed
If your drill has a separate gear selector, choose a low gear for tasks that require more turning force and a higher gear for faster drilling. For screw driving, a low gear often provides better control.
Use the trigger to regulate speed. Start slowly, especially when the bit first contacts the material, then increase speed gradually if needed. Avoid pressing harder than necessary to make the drill work faster.
Step 5: Fit the correct bit
Choose a bit designed for the material and task. Use a wood bit for wood, a metal bit for metal, and a suitable masonry bit for masonry when your drill is designed for that work.
To fit a bit in a keyless chuck:
- Release the trigger and move the forward/reverse selector to the center lock position, if your model has one.
- Hold the rear part of the chuck.
- Turn the front sleeve counterclockwise to open the jaws.
- Insert the bit straight into the chuck.
- Hold the rear part of the chuck and turn the front sleeve clockwise to tighten it.
- Check that the bit is centered and firmly held.
Keep the bit’s shank clean and insert it far enough for the chuck to grip it securely. Do not use the trigger to tighten the chuck while holding the chuck sleeve by hand.
Step 6: Position the drill
Place the tip of the bit where you want the hole to begin. Hold the drill with a firm, balanced grip and keep it aligned with the direction of the hole.
For ordinary drilling, aim to keep the drill perpendicular to the surface. If you need to drill at an angle, plan the angle before starting and make sure the workpiece is secured.
When drilling into wood, a pilot hole can help guide a larger screw or bit. Marking the location before drilling can also help prevent the bit from wandering.
Step 7: Start drilling slowly
Squeeze the trigger gently so the bit begins rotating at a low speed. Keep the drill steady as the bit enters the material. Once the bit is cutting cleanly, increase the speed gradually if needed.
Apply steady, controlled pressure. Excessive force can overheat the bit, damage the material, or cause the drill to stall. If the bit binds, release the trigger and remove the drill safely before trying again.
When drilling a deep hole, periodically withdraw the bit to clear debris, especially in wood. Keep the drill aligned as you continue.
Step 8: Finish the hole and stop the drill
As the bit approaches the other side of the material, reduce pressure and speed. This can help prevent splintering or sudden breakthrough.
Release the trigger when the hole is complete and wait for the chuck to stop. Remove the bit from the hole only after it has stopped rotating. Set the drill down securely before making adjustments.
How to Use a Black+Decker Drill as a Screwdriver
A cordless drill can drive screws when fitted with a suitable screwdriver bit. If your model has an adjustable clutch, use it to help prevent screws from being driven too deeply.
Choose the correct screwdriver bit
Match the bit to the screw head. Common types include Phillips, slotted, Torx, and square-drive bits. A bit that fits poorly can slip and damage the screw head.
Make sure the bit is securely held in the chuck or a suitable bit holder.
Set the clutch
Start with a low clutch setting. Lower settings are generally useful for small screws or softer materials. Increase the setting gradually if the clutch slips before the screw is fully seated.
There is no single correct number for every screw. Test the setting on a scrap piece of the same material when possible. Stop once the screw is seated; continuing to drive it can strip the screw head, damage the material, or break the screw.
Drive or remove the screw
Place the bit squarely into the screw head. Select forward and squeeze the trigger slowly. Keep the drill aligned with the screw and apply enough forward pressure to keep the bit engaged.
If the bit slips, stop and reposition it rather than continuing to spin. For long screws or dense wood, drilling a pilot hole can make driving easier and reduce the chance of splitting the material.
To remove a screw, release the trigger, select reverse, place the bit securely in the screw head, and operate the drill slowly.
Understanding Drill Speed and Torque
Speed and torque affect how the drill performs, but they serve different purposes.
Speed is how quickly the chuck rotates. Higher speed can help when drilling with an appropriate bit, while lower speed gives you more control when starting a hole or driving screws.
Torque is the turning force applied by the drill. The clutch on a screw-driving model helps limit that force. A low clutch setting is often suitable for small screws and delicate materials. A higher setting may be needed for larger screws or tougher materials.
For screw driving, a low gear and a modest clutch setting are useful starting points. Test the setting and adjust it as needed. For drilling holes, use the drill mode rather than a low screw-driving clutch setting if your model provides a separate drilling mode.
Do not treat clutch numbers as exact torque values. They are relative settings, and the correct setting depends on the tool, fastener, and material.
How to Remove a Drill Bit
You may need to remove a bit when switching from drilling to screw driving or replacing a worn accessory.
- Release the trigger and wait until the chuck stops.
- Move the forward/reverse selector to the center lock position, if your model has one.
- Hold the rear part of the keyless chuck.
- Turn the front sleeve counterclockwise to loosen the jaws.
- Pull the bit straight out once it is free.
If the bit is stuck, do not force it with the motor running or hold the chuck in a way that could cause the drill to start unexpectedly. Follow the manual’s instructions for loosening a tight chuck. If the chuck is damaged or the bit cannot be released safely, have the tool inspected.
Safety Measures When Using a Cordless Drill
A cordless drill is convenient, but its rotating bit and turning force can still cause injury. Use these precautions every time.
Work-area safety
Keep the work area clean, well-lit, and free of obstacles. Secure the material before drilling and make sure the bit will not contact hidden wiring, plumbing, or other hazards. When drilling into a wall, use an appropriate detector and take care around electrical outlets and switches.
Do not operate the drill near flammable liquids, vapors, or combustible dust. Drilling and metalworking can produce sparks or hot particles.
Personal protective equipment
Wear safety glasses or suitable eye protection to guard against flying chips and debris. Use hearing protection when the task or environment is noisy.
Avoid loose clothing, jewelry, or anything that could become caught in the rotating chuck. Tie back long hair and keep hands away from the bit and moving parts.
Safe handling
Hold the drill firmly and maintain a balanced stance. Use an auxiliary handle if your model provides one and the task requires additional control.
Do not place your hand behind the material where the bit may emerge. Stop the drill before clearing debris, changing bits, adjusting the workpiece, or making any other adjustment.
Battery safety
Use only a battery and charger approved for your drill. Keep battery contacts away from metal objects that could cause a short circuit. Do not expose batteries to excessive heat, water, or physical damage.
If a battery becomes unusually hot, swollen, cracked, or damaged, stop using it and follow the manufacturer’s instructions for safe handling and disposal. Do not attempt to open or repair a lithium-ion battery pack yourself.
Tool care
Keep the drill clean and dry. Remove dust and debris from the exterior after use, following the manual’s cleaning instructions. Do not immerse the tool in water or use solvents that could damage its housing.
Allow the drill to cool if it becomes hot during extended work. Repeated stalling, unusual smells, smoke, or abnormal noises are reasons to stop using it and inspect the tool.
How to Maintain a Black+Decker Cordless Drill
Regular care helps keep the drill ready for your next project.
- Clean it after use: Wipe away dust and debris with a dry or slightly damp cloth, following the manual. Keep vents clear.
- Inspect the chuck: Check that it opens and closes smoothly and holds bits securely.
- Use sharp, suitable bits: Dull or incorrect bits can make the drill work harder and may cause overheating.
- Store it properly: Keep the drill and accessories in a dry place, away from excessive heat and moisture.
- Care for the battery: Follow the battery’s charging and storage instructions. Do not leave it exposed to extreme temperatures.
- Check accessories: Replace damaged, bent, or worn bits rather than continuing to use them.
Do not dismantle the drill to repair internal electrical components unless you are qualified and the manufacturer’s instructions permit the work. For internal faults, contact an authorized service provider.
Why Is My Black+Decker Drill Not Working?
If your drill does not start, runs poorly, or fails to turn the bit, check the simple causes first. Remove the battery before inspecting the chuck or making adjustments.
The battery is not charged or connected properly
A depleted battery may prevent the drill from starting or cause it to lose power. Confirm that the battery is compatible, charged, and fully seated in the tool.
If the battery does not charge, check the charger’s indicators and consult the battery and charger instructions. Do not use a battery that is visibly damaged or unusually hot.
The forward/reverse selector is in the center position
On many models, the center position locks the trigger. Move the selector fully to forward or reverse, as appropriate, before operating the drill.
If the selector will not move, release the trigger and do not force it. Check the manual for the correct procedure.
The drill bit is loose
A loose bit may wobble or stop turning effectively. Release the trigger, lock the tool if applicable, and tighten the chuck by hand. Check that the bit is straight and properly seated.
The clutch setting is too low
When driving a screw, a low clutch setting may cause the drill to stop applying force before the screw is fully seated. Increase the setting gradually and test again. If you are drilling a hole, confirm that the drill is in drilling mode rather than a low screw-driving clutch setting.
The drill is overheating or overloaded
If the drill becomes very hot, slows down, or repeatedly stalls, release the trigger and let it cool. Check whether the bit is appropriate for the material and whether you are applying excessive pressure.
Do not keep forcing a stalled drill. If it continues to overheat or stop under normal use, discontinue use and seek service.
The motor or switch may be faulty
If the battery is charged and correctly installed, the selector is set properly, and the drill still does not operate, the problem may involve the trigger, motor, wiring, or another internal component.
Do not open the tool or attempt electrical repairs unless you are qualified and the manufacturer permits them. Contact an authorized service provider or consult the warranty information.
The chuck will not loosen or tighten
Make sure the drill is switched off and the battery is removed before examining a stubborn chuck. Follow the manual’s instructions for loosening or tightening it. Avoid using the motor to force the chuck open or closed while holding the sleeve by hand.
If the chuck is jammed, damaged, or will not grip bits securely, have it inspected or replaced through an appropriate service channel.
Frequently Asked Questions-FAQs
How do I use a Black+Decker cordless drill for the first time?
Start by reading the manual for your model. Charge and install the compatible battery, identify the trigger and direction selector, and fit the correct bit with the drill switched off. Test the drill at low speed on scrap material before using it on your project.
Which setting should I use for drilling holes?
Select the drilling mode if your model has a mode collar with a drill-bit symbol. If the drill has a separate gear selector, choose a gear appropriate for the bit and material. Start at a controlled speed and adjust as needed. The correct setting depends on the drill and task.
How do I use the drill as a screwdriver?
Fit a screwdriver bit that matches the screw head, select forward, and use the screw-driving mode if your model has one. Begin with a low clutch setting and increase it gradually until the screw seats without being driven too deeply.
How do I change the direction of a Black+Decker drill?
Release the trigger first. Move the forward/reverse selector to the position marked for the direction you need. Forward is generally used to drill or drive screws; reverse is used to remove screws. Check your model’s markings to confirm the direction.
Can I use any Black+Decker battery with my drill?
No. Battery compatibility depends on the tool’s battery platform and model. Use only a battery specified for your drill. A battery that looks similar may not fit or operate correctly.
How long does a Black+Decker lithium-ion battery hold its charge?
Charge retention depends on the battery model, age, temperature, storage conditions, and how it is used. Follow the manufacturer’s guidance for charging and storage rather than relying on a single time estimate. If a battery loses charge unusually quickly, it may need inspection or replacement.
Why does my drill stop when I drive a screw?
The clutch may be set too low, the battery may be depleted, or the screw may be encountering too much resistance. Check the battery and clutch setting, make sure the bit fits the screw head, and consider making a pilot hole. Stop if the drill stalls rather than forcing it.
Can I drill into concrete with a Black+Decker cordless drill?
Only if your particular model and bit are suitable for the job. Some drills have a hammer function for masonry, while others are intended for wood, metal, plastic, and screw driving. Check the manual and use the correct masonry bit. For substantial concrete drilling, a suitable hammer drill may be required.
Final Thoughts
A Black+Decker cordless drill can make household repairs and DIY projects easier when you know how to use its controls and choose the right accessories. Start with a charged, compatible battery, secure the workpiece, fit the correct bit, and select the proper direction, mode, speed, and torque setting for the task.
Use slow, controlled trigger pressure and avoid forcing the drill when it stalls. Keep the tool clean, inspect the battery and bits, and follow the instructions for your exact model. With proper setup and safe handling, you can use your cordless drill more confidently for drilling holes, assembling furniture, and driving screws around the home.