
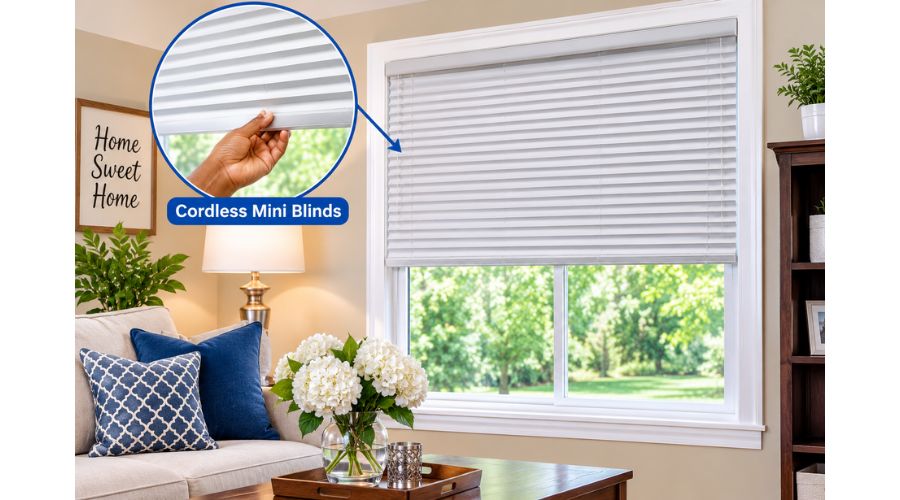
Cordless mini blinds are typically designed to fit standard-size windows. If you buy one for a smaller residential or garage window, you may end up with a significant amount of extra length.
While getting that additional length from the manufacturer may seem like good value for money, it can make the blinds look like a poor fit for the window. Thankfully, you may be able to shorten cordless mini blinds with relatively little effort.
How to shorten cordless mini blinds depends on the product’s design. Many traditional horizontal mini blinds can be shortened by removing excess slats and repositioning the bottom rail. However, not every cordless blind is designed to be shortened at home. Some models use proprietary lift mechanisms, sealed components, or instructions that differ from the process described here. Always check the manufacturer’s instructions for your specific model before making any cuts or removing parts.
Knowing how these blinds work is a useful starting point. It can help you understand which components can be adjusted and which should be left alone.
Also Read:
What Are Cordless Mini Blinds?
While the blinds are termed cordless, they still have cords running through the slats to operate them.
However, they are called cordless because they do not include the exposed string typically used to operate standard blinds. That string usually hangs from the top rail and is pulled to raise or lower the covering.
Cordless mini blinds do not have a dangling pull cord. Instead, internal cords and a lifting mechanism are concealed within the blind. The exact mechanism varies by manufacturer and model.
In many manual cordless mini blinds, you raise or lower the covering by holding the bottom rail and moving it gently. The internal mechanism is designed to hold the blind at the selected height. Some products have a different operating method, so follow the instructions supplied with your blinds rather than assuming every model works the same way.
One main advantage of this design is that it creates a clean look across the window treatment. It can also reduce the risks associated with dangling operating cords, which can be a hazard for children and pets.
On the downside, the height of manually operated blinds may be limited by how high the person operating them can reach. Since your hand must grasp the bottom rail, you may need to use a step stool for a tall window. Use a stable step stool and avoid stretching or standing on furniture.
Types of Cordless Blinds
Various types of blinds are often paired with cordless controls. Of these, three common types include:
-
Wood cordless mini blinds
-
Faux wood cordless mini blinds
-
Vinyl cordless mini blinds
You will notice that these cordless mini blinds differ mainly in the material used to make the slats. You might select one material over another because of its appearance, durability, maintenance needs, or the value it adds to your décor.
Wood blinds have a natural appearance, while faux wood blinds are designed to resemble wood and may be suitable for rooms where moisture is a concern. Vinyl blinds are often lightweight and easy to clean. Their exact care requirements depend on the product.
The process of shortening traditional cordless horizontal mini blinds may be similar regardless of the material, but the manufacturer’s instructions take priority. Some materials can crack, chip, or splinter if handled roughly. Do not assume that a procedure suitable for one model is safe for another.
Before You Shorten Cordless Mini Blinds
Before starting, confirm that your blinds are designed to be shortened. Review the installation and adjustment instructions, and check whether the manufacturer recommends professional service.
Shortening blinds is a permanent adjustment. Once you remove slats or cut cords, you may not be able to restore the original length. If you are unsure about the correct length or the blind’s construction, pause and seek guidance before cutting anything.
Measure the window carefully
Measure the height you want the blind to cover. For an inside mount, measure from the intended mounting position at the top of the window opening to the sill. For an outside mount, measure from the intended top position to the desired lower edge.
Do not assume the blind should end exactly at the windowsill. Depending on the window and your preference, you may want the bottom rail to sit slightly above the sill or cover a little more of the opening. Check the manufacturer’s measuring guidance and account for the bottom rail itself.
Decide how many slats to remove
Lower the blind fully using its normal operating method. Identify the slat that should become the last slat above the bottom rail. Mark it with a removable piece of tape or another non-damaging marker.
Count the slats below that point. This will help you estimate how much length to remove. Check the position again before making any changes; removing too many slats can leave the blind too short.
Protect the work area
If the manufacturer’s instructions require you to remove the blind from the window, place it on a clean, flat surface. Use a surface large enough to support the full blind so the headrail and slats do not bend.
Keep small plugs, caps, screws, and other components together in a container. Work in a well-lit area, and keep children and pets away from the tools and small parts.
Supplies You May Need
Shortening some traditional cordless mini blinds requires only a few basic tools. The exact supplies depend on the product and its instructions.
Commonly needed items include:
-
Measuring tape
-
Scissors suitable for the specified cords
-
Pliers, if the instructions call for them
-
Flat-head screwdriver, if the plugs are designed to be released with one
-
Removable tape or a marker
-
A small container for plugs and other parts
-
The manufacturer’s installation and adjustment instructions
Do not use a tool to pry open a component unless the instructions specifically recommend it. Plastic plugs and bottom rails can break if excessive pressure is applied. Avoid cutting any cord until you have confirmed its purpose and the manufacturer’s procedure.
Preliminary Step: Measure Your Window’s Height
If you are going to adjust the slats to fit your window, you need to know the target length. Use a tape measure to determine the exact height the mini blinds should cover.
For an inside mount, measure from the top of the window opening where the blind will be installed to the sill below. For an outside mount, measure from the planned top mounting point to the desired bottom edge.
Record the measurement and check it twice. Also consider the position of the bottom rail, which may add height beyond the final slat. Your goal is to make the blind fit the window properly without leaving it too short or causing the bottom rail to press against the sill.
Step 1: Install the Blinds
Once you have recorded your window measurements, install the mini blinds by following the user manual.
The manual typically features a step-by-step installation procedure, sometimes with pictures, to make the process easier to follow. Since bracket designs vary, the instructions for your model should guide the installation.
In general, the process may involve:
-
Positioning the brackets at the specified locations along the top of the window opening or on the wall.
-
Marking the screw locations and drilling pilot holes if the instructions require them.
-
Securing the brackets with the specified fasteners.
-
Placing the headrail into the brackets and confirming that it is properly seated.
-
Installing any covers or trim supplied with the product.
Some systems use different bracket arrangements or mounting methods. Do not assume that every blind uses adhesive brackets, snap-in brackets, or the same number of mounting points. Use the hardware supplied with the product and follow the manufacturer’s instructions.
If the blind is already installed securely, you may not need to reinstall it before measuring. However, you should still check that it is level and operates normally before shortening it.
Step 2: Test the Blinds by Lowering and Raising Them
You need to see the full length of the blinds to determine how much length you must remove. Lower the blind fully using its normal operating method.
Identify the slat that should become the last slat above the bottom rail. This is the point where the shortened blind will end. Mark the selected slat so you can distinguish the slats you intend to keep from those you plan to remove.
Check the measurement against your window height. If the blind is much longer than the opening, make sure you are not counting the bottom rail as a slat. The bottom rail is a separate component and must be reattached after the adjustment.
If the blind does not lower smoothly, stop and address that problem before shortening it. A blind that is already jammed, uneven, or damaged may require repair rather than a length adjustment.
Step 3: Remove the Bottom Rail Plugs
Many traditional mini blinds have a bottom rail that holds the lowest slat and helps keep the blind aligned. Some designs have plastic plugs or end caps on the underside of the rail. The number and shape of these plugs vary.
The plugs may cover the ends of lift cords or ladder cords. Depending on the design, they may pull out, twist off, or release in another way described in the instructions.
If your model uses removable plugs, release them carefully. A flat-head screwdriver may be appropriate for some plug designs, but do not force it under a plug that is not intended to be pried out. Excessive pressure can crack the plug or damage the bottom rail.
Keep the plugs together so you can replace them later. If the rail uses a different kind of closure, follow the product’s instructions rather than trying to remove it with a screwdriver.
Step 4: Remove the Bottom Rail
The next step depends on how the lift cords and bottom rail are assembled. Some traditional blinds use knots or retainers to secure the lift cords. Other models use a different arrangement.
Consult the instructions for your specific blind before loosening or removing anything. If the instructions describe releasing a knot or retainer, do so carefully and keep track of how the components were positioned.
Once the required retainers have been released, the bottom rail may be able to slide away from the remaining slats. Do not pull forcefully on the lift cords or drag the rail across the slats. If it does not move easily, stop and check whether another retainer or component is still holding it in place.
The bottom rail helps keep the blind aligned. Handle it carefully and avoid bending it while removing it.
Step 5: Remove the Excess Horizontal Connector Cords
Traditional mini blinds may use ladder cords to support the slats and separate them evenly. Lift cords run through the blind and help raise or lower it. These cords serve different purposes and should not be confused.
If the manufacturer’s shortening instructions call for removing the lower portion of the ladder cords, identify the correct cords before cutting. Do not cut the lift cords or any cord whose function you are unsure of.
Cutting the wrong cord can damage the blind or prevent it from operating properly. If the cord layout is unclear, stop and contact the manufacturer or a qualified blind-repair professional.
Only remove the cord sections specified in the instructions. Keep the remaining cords intact and organized so they can be used to secure the shortened blind.
Step 6: Remove the Excess Slats
After the manufacturer’s specified lower cord sections have been released or removed, the excess slats may be able to slide out of the ladder cords.
Remove only the slats below the one you marked as the new last slat. Keep the remaining slats in their original order and orientation. This helps preserve the blind’s appearance and operation.
Do not pull slats out if they remain attached or if doing so requires force. Some models use different internal arrangements, and the correct removal method may not match a traditional mini blind.
Important: The order of removing slats and dealing with the lower ladder cords can vary by model. Follow the instructions supplied with your blind. Do not treat the steps as interchangeable unless the manufacturer specifically says they are.
Step 7: Reattach the Bottom Rail and Position It at the New Last Slat
Once the excess slats have been removed, the bottom rail must be reattached according to the product instructions.
Position the rail below the remaining slats and make sure it is level. The lift cords and ladder cords must be routed through the correct openings and retainers. Do not guess where a cord should go or force it through a small opening.
If the instructions require the lift cords to be secured with knots or retainers, use the specified method. Make sure the cords are even so the bottom rail does not hang at an angle.
A measuring tape can help you compare the two sides, but the manufacturer’s instructions should determine how the cords are secured. If the rail remains crooked or the blind does not move smoothly, do not continue tightening or cutting cords. Recheck the assembly or seek help.
Step 8: Finish the Ladder Cords as Directed
After the bottom rail is reattached, inspect the shortened blind. Confirm that the remaining slats are evenly spaced and that the rail sits level.
Some traditional mini blinds require the unused lower portions of ladder cords to be trimmed and secured. Other products use different retainers or do not require this step. Follow the instructions for your model.
Do not cut the ladder cords simply because they look too long. Make sure you know which cords are excess and which are needed to support the slats or secure the bottom rail.
If your kit includes eyelets, plugs, or other retainers, install them only as directed. Use pliers only if the instructions specify them, and avoid crushing or deforming the parts.
Step 9: Replace the Rail Plugs
If your blind uses removable bottom-rail plugs, replace them after the cords and rail have been secured according to the instructions.
Tuck the cords into the designated spaces without pinching or trapping them. Reinstall the plugs or end caps in their original positions and make sure they are seated securely.
Do not force a plug that does not fit. It may be reversed, misaligned, or intended for a different opening. Check the assembly before applying pressure.
Step 10: Test the Shortened Blinds
Once the bottom rail and plugs are back in place, test the blind gently.
Raise and lower it through its normal operating range. Check that:
-
The bottom rail remains level.
-
The blind moves without catching.
-
The slats remain evenly spaced.
-
The lift mechanism holds the blind at the selected height.
-
No cords are pinched, loose, or visibly damaged.
-
The blind stops at the intended height without pressing hard against the sill.
If the blind is uneven, sticks, or will not stay in position, stop using it until you identify the cause. Do not try to correct a mechanical problem by pulling harder.
Why Do You Need to Shorten Your Cordless Mini Blinds?
Cordless mini blinds can make an excellent addition to many rooms. Their simple appearance can complement different décor styles, and they provide privacy and light control.
However, there are several reasons you may want to shorten them.
1. To Make Them Fit Better
Mini blinds are often sold in standard sizes. If you have a small or irregularly sized window, finding a ready-made blind that fits perfectly may be difficult.
Shortening a compatible blind can help it fit a non-standard window. Before making any changes, confirm that the manufacturer allows the product to be shortened and that the final dimensions will still provide adequate coverage.
2. To Improve the Appearance of the Window
A blind that extends far below a small window can look oversized. It may also cover decorative trim or other features you want to keep visible.
A properly sized blind can create a neater appearance and make the window treatment look more intentional. Measure carefully so the bottom rail does not end up too high or too low.
3. To Keep the Blind Clear of the Floor or Sill
A blind that is too long may rest against the sill, extend into an area where it can be bumped, or interfere with objects near the window. Shortening it may help keep the bottom rail clear.
The correct length depends on the window and the intended use of the room. Do not shorten the blind so much that it leaves an unwanted gap or fails to cover the area you need.
4. To Reduce Access for Children and Pets
Cordless blinds avoid the dangling operating cords found on many older designs, but window coverings still need to be installed and used safely. A long blind may be easier for a child or pet to grab, pull, or play with.
Shortening a blind may reduce excess material near the floor, but it does not replace safe installation and supervision. Follow the manufacturer’s safety guidance and keep window-covering components away from children and pets.
Common Mistakes to Avoid When Shortening Cordless Mini Blinds
A careful approach can prevent damage and help the blind operate properly.
Cutting the wrong cords
Lift cords and ladder cords have different jobs. Cutting a lift cord can interfere with raising and lowering the blind. If you cannot identify the cords confidently, do not cut them.
Removing too many slats
Once slats have been removed, restoring the original length may not be possible. Confirm the target height and mark the last slat before starting.
Forcing the bottom rail or plugs
A rail or plug that will not move may still be attached or may use a different release method. Forcing it can crack the component or damage the cords.
Ignoring the product instructions
Cordless blinds are not all built the same way. Instructions for one model may not apply to another, even if the blinds look similar.
Testing the blind before it is fully assembled
Do not operate the blind while cords, retainers, or plugs are loose. Complete the manufacturer’s assembly steps first, then test the blind gently.
Frequently Asked Questions
Can all cordless mini blinds be shortened?
No. Many traditional horizontal mini blinds can be shortened, but some cordless blinds are not designed for user adjustment. Check the product instructions or contact the manufacturer before making permanent changes.
How do I know how many slats to remove?
Measure the window from the intended mounting point to the desired bottom edge. Then lower the blind and identify the slat that should become the last slat above the bottom rail. Check the measurement again before removing anything.
Can I shorten cordless blinds without removing them from the window?
Some products may allow limited adjustments while installed, but the manufacturer’s instructions determine whether that is appropriate. If the instructions require removing the blind, do not attempt to work around that step. A stable work surface can make the process easier and reduce the risk of bending the rail.
What is the difference between lift cords and ladder cords?
Lift cords help raise and lower the blind. Ladder cords support the slats and help keep them spaced evenly. They are not interchangeable, and cutting the wrong cord can prevent the blind from working correctly.
What if the bottom rail is crooked after shortening?
Stop operating the blind and review the assembly instructions. A crooked rail may indicate that the cords are uneven, incorrectly routed, or not secured as intended. Do not keep pulling the rail to force it level. If you cannot identify the issue, contact the manufacturer or a repair professional.
Can I shorten faux wood or vinyl mini blinds the same way as wood blinds?
The general process may be similar for some traditional models, but the material and internal design can affect how the blind should be handled. Faux wood and vinyl slats may crack or deform if bent or cut improperly. Use the instructions for the exact product.
Will shortening my blinds affect the warranty?
It may. Warranty terms vary by product and manufacturer, and making permanent changes may affect coverage. Review the warranty information or contact the manufacturer before shortening the blind.
What should I do with the extra slats?
Keep the removed slats and small components in case you need them for reference or the manufacturer requests them. If you no longer need them, dispose of them according to local requirements and keep small parts away from children and pets.
What if the blinds do not raise or lower smoothly after shortening?
Stop using the blind until the cause is identified. The cords may be incorrectly routed, a retainer may be loose, or a component may have been damaged. Recheck the manufacturer’s instructions and contact a qualified repair professional if needed.
Conclusion
Shortening cordless mini blinds can help them fit a window more neatly and improve the appearance of your room. It may also prevent an oversized blind from extending farther than you want. However, the process depends on the construction of the blind, and not every cordless model is designed to be shortened at home.
Before starting, measure the window carefully, confirm that the manufacturer permits shortening, and gather the tools specified in the instructions. Identify the slat you intend to keep, remove only the components described in the product guide, and avoid cutting any cord whose purpose you do not understand.
Once the blind has been reassembled, test it gently to make sure the bottom rail is level and the mechanism operates normally. If the blind becomes crooked, sticks, or no longer holds its position, stop and seek guidance rather than forcing it.
With careful measuring and model-specific instructions, you can determine whether shortening your cordless mini blinds is a practical home-improvement project—and avoid damage caused by guessing or rushing through the process.